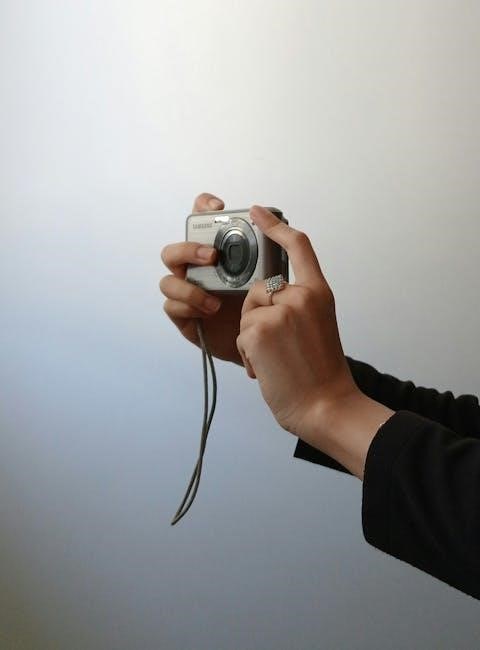
Welcome to your comprehensive guide to manual mode photography. This cheat sheet will help you master aperture, shutter speed, and ISO for stunning, professionally controlled results.
Whether you’re a beginner or an experienced photographer, this manual photography cheat sheet provides quick reference tips and practical techniques to elevate your craft effortlessly.
What is Manual Mode in Photography?
Manual mode in photography gives you complete control over your camera’s settings, allowing you to adjust aperture, shutter speed, and ISO independently. Unlike auto modes, manual mode lets you dictate every aspect of exposure, ensuring creative freedom. It’s ideal for capturing unique effects, such as freezing fast motion or creating artistic blur. By mastering manual mode, you can overcome challenging lighting conditions and produce images that reflect your vision. This mode is essential for photographers seeking precision and artistry. It’s different from manual focus, which only controls how the camera sharpens the image. With practice, manual mode becomes a powerful tool for achieving professional results.
Why Shoot in Manual Mode?
Shooting in manual mode offers unparalleled creative control and consistency in your photography. It allows you to override automatic settings, ensuring your vision is accurately captured. Unlike auto modes, manual mode lets you adjust aperture, shutter speed, and ISO independently, giving you the freedom to experiment with unique effects. This mode is especially useful in challenging lighting conditions, where auto modes often fail to deliver desired results. By mastering manual mode, you gain precision over every aspect of your photos, enabling you to achieve professional-quality images. It’s the key to unlocking your camera’s full potential and taking your photography to the next level.

Understanding the Exposure Triangle
The Exposure Triangle is a fundamental concept in photography, combining aperture, shutter speed, and ISO to control light and achieve perfectly balanced images.
Aperture: F-Stop and Its Impact on Photos
Aperture, measured in f-stops, regulates the amount of light entering the camera and controls depth of field. Lower f-stops (e.g., f/2.8) create a shallow focus, blurring backgrounds, while higher f-stops (e.g., f/16) keep more of the image sharp. This setting is crucial for creative control, allowing you to emphasize subjects or capture detailed landscapes. Understanding how to balance aperture with shutter speed and ISO is key to mastering manual photography. Use this cheat sheet to quickly reference ideal f-stops for various scenarios, ensuring your photos achieve the desired aesthetic. Experiment with different apertures to see how they transform your images and tell your story effectively.
Shutter Speed: Creative Effects and Techniques
Shutter speed determines how long the camera’s shutter remains open, measured in seconds or fractions of a second. It controls motion effects, with faster speeds freezing action and slower speeds creating blur. Use fast shutter speeds (1/1000th of a second or faster) to capture sharp images of moving subjects like wildlife or sports. For artistic effects, slow speeds (1 second or slower) can create silky waterfalls or streaked clouds. Panning with slower speeds blurs backgrounds while keeping subjects sharp. Experiment with shutter speed to balance creativity and technical precision, ensuring your photos convey the desired mood and movement. This cheat sheet provides quick references for common scenarios to help you master shutter speed techniques effortlessly.
ISO: Sensitivity and Noise Management
ISO regulates your camera’s sensitivity to light, ranging from low values (ISO 100-400) for bright conditions to high values (ISO 6400 and above) for low-light situations. Lower ISOs produce sharper images with minimal noise, while higher ISOs introduce grain or digital noise. To minimize noise, use the lowest ISO necessary for the scene and balance it with aperture and shutter speed. In low-light scenarios, higher ISOs may be unavoidable, but modern cameras often handle noise better at higher sensitivities. This cheat sheet provides guidelines for ISO settings, helping you manage noise effectively while capturing well-exposed images in various lighting conditions. Mastering ISO is key to achieving professional-quality photos with optimal clarity and detail.
Focusing Techniques in Manual Photography
Master manual focus and autofocus modes for sharp images. Use the focus ring or live view for precision. Practical tips ensure clarity in every shot, enhancing your photography skills.
Manual Focus vs. Autofocus: Key Differences
Manual focus and autofocus are two distinct approaches to achieving sharp images. Manual focus requires physically adjusting the lens for precise control, ideal for creative shots. Autofocus automatically adjusts, offering speed and convenience in dynamic situations. While autofocus is faster, manual focus ensures exact sharpness, especially in low-light or complex compositions. Understanding both modes helps photographers choose the best option for their scene. This cheat sheet highlights when to use each, ensuring clarity and professional results in every shot.
Mastering Focus Modes for Sharp Images
Mastering focus modes is essential for achieving sharp, professional-quality images. Single Shot AF captures stationary subjects with precision, while Continuous AF excels for moving subjects by adjusting focus dynamically. Manual Focus offers full control, ideal for creative compositions or challenging lighting. Understanding these modes allows photographers to adapt to any scenario. This cheat sheet provides tips for selecting the right mode, ensuring clarity and detail in every shot. By practicing these techniques, photographers can enhance their skills and consistently produce stunning, sharp images that stand out. This guide simplifies focus modes, helping you master them for exceptional photography results.
White Balance and Metering Modes
White balance and metering modes are crucial for accurate color and exposure. This cheat sheet explains how to use Kelvin scale and metering techniques effectively.
Understanding White Balance and Kelvin Scale
White balance ensures accurate colors by adjusting the camera to the light source’s color temperature, measured in Kelvin (K). Common settings include 5600K for daylight and 3200K for tungsten light. This cheat sheet helps you master white balance for consistent results across lighting conditions.
Understanding the Kelvin scale is key to manual photography. It allows you to set the right tone, from warm (lower Kelvin) to cool (higher Kelvin). This guide provides tips for adjusting white balance manually or using presets effectively, enhancing your image quality and creative control.
Using Metering Modes for Accurate Exposure

Metering modes are essential for achieving accurate exposure in manual photography. They measure light to determine the ideal settings for your scene. The most common modes are Spot, Center-Weighted, and Matrix (or Evaluative). Spot metering focuses on a specific area, while Center-Weighted averages the light around the center. Matrix mode analyzes the entire scene for balanced exposure. This cheat sheet explains how to use each mode effectively, ensuring your photos are well-lit and detailed in any lighting condition.
Mastering metering modes allows you to capture images with precise brightness and contrast. Refer to this guide for practical tips on when to use each mode, helping you achieve professional-looking results effortlessly.

Practical Cheat Sheet for Common Scenarios
This cheat sheet provides quick-reference settings for ISO, aperture, and shutter speed across various scenarios, ensuring you’re prepared for portraits, landscapes, and low-light conditions with ease.
Quick Reference Guide for ISO, Aperture, and Shutter Speed
This cheat sheet simplifies manual mode photography by breaking down ISO, aperture, and shutter speed settings for common scenarios. Use low ISO (100-400) for bright lighting and high ISO (6400+) for low light. Aperture ranges like f/2.8-f/5.6 create shallow depth of field, while f/8-f/16 ensure sharp landscapes. Shutter speed: 1/1000s+ for freezing motion, 1/10s-1s for creative blur, and 30s+ for star trails. Adjust these settings based on your scene to achieve perfectly exposed photos. This guide helps you master the exposure triangle, ensuring you’re ready for any situation, from portraits to night photography.
Best Practices for Shooting in Different Lighting Conditions
Mastering lighting is crucial for stunning photos. In bright light, use lower ISO (100-400) and faster shutter speeds (1/1000s+) to avoid overexposure. For low light, increase ISO (6400+) and use wider apertures (f/2.8-f/4) to let more light in. In harsh midday sun, seek shade or use reflectors to soften light. During golden hour, lower ISO (400-800) and slower shutter speeds (1/30s-1/60s) capture warm tones. In overcast conditions, use mid-range apertures (f/5.6-f/8) and ISO 400-800 for balanced results. Experiment with these settings to adapt to any lighting scenario, ensuring well-exposed and visually appealing images every time.

Final Tips for Mastering Manual Photography
Consistency and practice are key to mastering manual photography. Regularly review your work, adjust settings, and stay patient. Use a cheat sheet for quick reference and improvement.
Practice Exercises to Improve Your Skills
Regular practice is essential to mastering manual photography. Start by experimenting with aperture, shutter speed, and ISO in different lighting conditions.
Try capturing the same scene using various combinations to understand their effects. Practice focusing techniques, switching between manual and autofocus to see the differences.
Shoot in RAW format to maximize post-processing flexibility. Use a cheat sheet as a quick reference guide for settings in common scenarios, such as portraits or landscapes.
Set weekly challenges, like photographing moving subjects or low-light scenes, to refine your skills. Review your photos regularly to identify areas for improvement and adjust accordingly.
Consistency and patience will help you become more confident in manual mode, ensuring you capture stunning, professionally controlled images every time.
Troubleshooting Common Issues in Manual Mode
When shooting in manual mode, common issues like overexposed images, blurry photos, or excessive noise can arise. Use your camera’s built-in light meter to ensure balanced exposure.
If images are too bright, adjust the aperture or shutter speed. For blur, check shutter speed—faster speeds freeze motion, while slower speeds create artistic blur.
High ISO settings can introduce noise; use the lowest possible ISO for the lighting conditions. Consult a manual photography cheat sheet for quick solutions to these issues.
Regularly review your photos to identify patterns in errors and adjust your techniques accordingly. Practice and patience will help you overcome these challenges and achieve professional results.
Mastering manual mode photography requires practice and patience. Use this cheat sheet as a guide to refine your skills and capture stunning, professional-quality images consistently.
Summarizing the Key Takeaways
Manual mode photography empowers you with full control over aperture, shutter speed, and ISO, enabling creative and precise results. A photography cheat sheet simplifies mastering these elements, offering quick references for various lighting conditions and scenarios. Understanding the exposure triangle and white balance is essential for achieving balanced and visually appealing photos. Focus modes and metering techniques also play a critical role in capturing sharp, well-exposed images. Regular practice and troubleshooting common issues will refine your skills. By leveraging these tools and tips, you can confidently transition from automatic to manual mode, unlocking your camera’s full potential and elevating your photography to new heights;
Encouragement to Keep Practicing and Learning
Mastering manual mode photography is a rewarding journey that requires patience and consistent practice. Embrace challenges as opportunities to grow and refine your skills. Use your photography cheat sheet as a trusted companion to guide you through different scenarios and lighting conditions. Remember, every shot is a chance to experiment and learn, so don’t be afraid to try new techniques. Celebrate small victories and stay motivated by reviewing your progress. With dedication, you’ll unlock your camera’s full potential and capture stunning, creative images that reflect your unique vision. Keep shooting, learning, and enjoying the process of becoming a skilled manual mode photographer!

Leave a Reply
You must be logged in to post a comment.